Showing posts with label tasty. Show all posts

Sunday, January 6, 2013

{tasty} Spicy Buffalo Lentils

There are some things I am just simply not good at.

Time management may top that list. I confess, I am a procrastinator. You give me a hard deadline and you bet I will get it done, albeit I will surely wait until the eve of said deadline to start it. No deadline? Let's just say I have projects I started over 3 years ago that still sit unfinished. I have a never ending to-do list of ideas for home projects, craft projects, recipes...and simply not enough hours, or sometimes desire, to get them done.

Also on that list? Creating recipes. I am, however, one heck of a recipe follower. There are times that either I or my husband have a recipe idea and I make it happen. There is that little detail however of remembering how I made it. Of course, I can't make it that easy on myself and just write it down as I go. Or when I do write it down I throw it away or bury it in the mail pile and it's never seen again. Or I write down my ingredients and the meal turns out exactly as I hoped for but I didn't take pictures. Who wants to take pictures every 30 seconds while they are trying to get their family fed? Yep, that sounds like me but eventually I get my act together, even if it means making the same thing 4 times in a month.

I am still struggling to find a decent place to take natural light pictures in my house. It's proving to be quite difficult. We should move.


 Spicy Buffalo Lentils:
  • 2 cups cooked Lentils
  • 2 Carrots, peeled and diced
  • 2 Celery stalks, diced
  • 1/2 small Onion, diced
  • 3 strips of Bacon, cooked and crumbled
  • 1/3 cup Franks hot sauce
  • 2 TBSP Balsamic Vinegar
  • 1 1/2 TBSP Olive Oil, divided
  • 1-2 cloves Garlic, minced
  • 1 TBSP Honey
  • 1/3 cup Blue Cheese, plus more for topping
Cook bacon and set aside. 

Cook lentils according to package directions. Drain off any excess liquid. We always have either brown or french green lentils on hand and both work well for this dish. 

In a small dish combine hot sauce, vinegar, 1 tbsp olive oil, garlic and honey and whisk to combine. Set aside.

Heat remaining 1/2 tbsp of olive oil in a saute pan over medium high heat. Add onion, carrots and celery. Cook until softened, about 6-8 minutes. Add crumbled bacon and 2 cups of lentils and stir to combine. Add sauce and blue cheese and stir to fully coat lentils. Served topped with additional blue cheese.
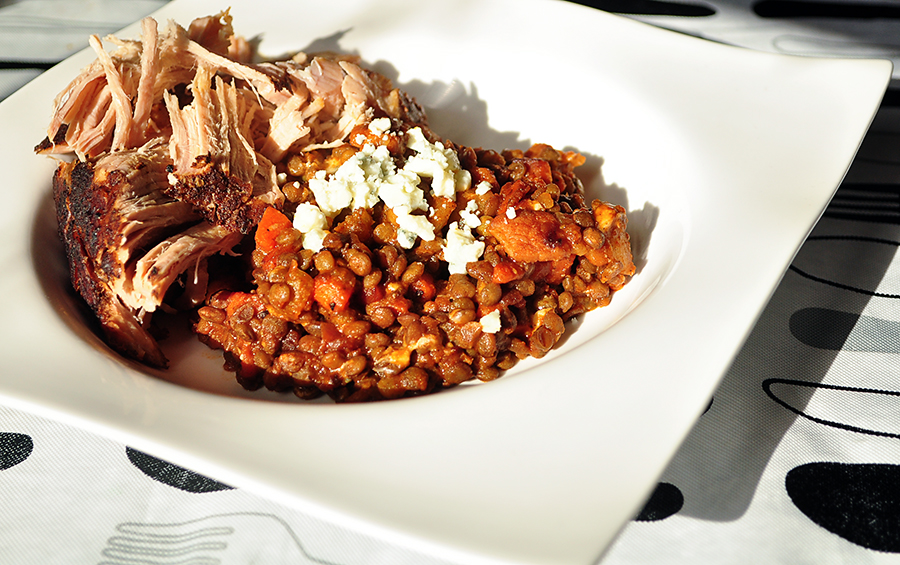


You can certainly enjoy this dish on it's own, but serving it up with slow cooked pulled pork is a fabulous idea too!

Monday, August 15, 2011

{off topic} Not in a Rut

No, not a rut exactly.

A funk? No, not that either.

Busy? To a certain degree.

Overwhelmed? Yep, I think that's the one.

I feel like I get in this overwhelmed state more and more often these days. There is so much I want to be doing with my time that sometimes I find myself doing none of it, because I can't decide which to focus on. When I sit down at my computer I think of all the things I should be doing. Going through pictures, editing, blogging, perhaps working on a fan base for my Etsy shop and Facebook fanpage. And all I want to do is browse Pinterest and play Cityville. Ok, forget I mentioned Cityville. I'm not proud.

So what have I been doing?


I have been getting my craft on. Albeit, not as much as I would like. My "workflow" is to pretty much start every project I can possibly fit on my desk at one time and then hop around until something is finished. Right now my started-but-not-completed pile is up to 8 projects ranging from frames to printer trays.

I will be selling at a craft fair through my church in October so I am trying to get a move on so I have a decent number, and variety, of items to sell. I am praying for a good day as anything I happen to make from it will go towards my Cambodia missions trip.

Believe it or not, I have been taking pictures. Apparently, not of my new craft items.


Some from my Nikon D90


Others with some fun apps on my Droid

While I haven't been too adventurous in the kitchen, I have made some delicious recipes. Like Blueberry Cardamom Scones, delish! The Pioneer Woman's Dr Pepper Shredded Pork. Two of my favorite things, how could you go wrong? And most recently Roasted Squash with Lentils and Goat Cheese from Smitten Kitchen. Of course, I also have a long list of recipes I have been dying to try like Peanut Butter Fudge Pretzel Brownies from Jessica at How Sweet It is. Or Knock You Naked Brownies from The Pioneer Woman. And Chocolate Chip Cookie Dough brownies from Brown Eyed Baker.

I suppose you can see where my mind is.

Friday, June 17, 2011

{tasty} BLT...BAS?

I have a problem.

If its not already evident by the recipes I have already posted, its somewhat a theme, I LOVE bacon. but that's not actually the problem I wanted to talk about...

I am downright terrible at measuring ingredients. You would think if I intend to share a recipe that I would take the time to measure, but I like to make things up as I go along. And if I DO measure, its a pretty safe bet to say I don't write it down. So a month later, when I'm finally ready to post the recipe, I have no idea what I used or how much of it went where. 

This recipe however is so simple that its pretty easy to recall. So simple, that I almost feel silly posting it. But I have to. Its too delicious not too. You'll thank me for it. 

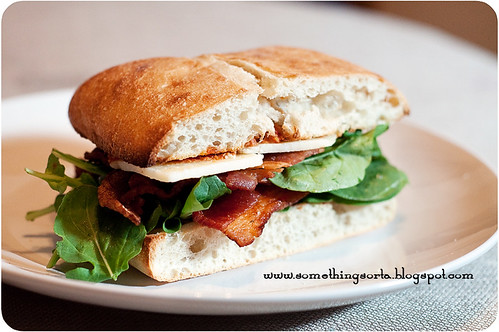
This bacon/lettuce/tomato is actually a bacon/arugula/sun dried tomato spread. and every bit of deliciousness. 

You can make the spread ahead of time. The flavors develop wonderfully. You would, at least, want to make and refrigerate it prior to starting your bacon.


Sun Dried Tomato Spread:
2/3 cup mayonnaise -I happen to have found and love this black pepper mayo. If you use the regular stuff I suggest adding a nice spicy dash of pepper to the spread.
14 sun dried tomato halves
2 tbsp balsamic vinegar
2-3 cloves garlic -yes, I totally go the convenient route, but fresh garlic for this would be great!

Add all ingredients together in a small food processor and blend until well incorporated. It will be a little chunky. 

this is pre-refrigeration. I wouldn't say its the prettiest picture, but it brightens up nicely while it sits.

For the rest of the sandwich you will need:
16 slices thick cut bacon
14oz Ciabatta flatbread loaf
8oz sharp white cheddar cheese, sliced
arugula
additional balsamic vinegar
olive oil

Cook the bacon until crisp, cut in half, set aside

Cut a 14oz ciabatta flatbread loaf in to 4 equal pieces across the short side. Then slice each across through the middle. Brush each piece with olive oil and balsamic vinegar and toast in the oven until lightly browned. 
You can use ciabatta rolls for this, but the flatbread gives you a little more surface area to pile on all the good stuff.

Slather the sun dried tomato spread on all 8 pieces of bread. Don't be shy. Starting with the bottom piece of bread, pile on a large handful of arugula, followed by 8 half slices of bacon, then several slices of the sharp white cheddar. top with the other piece of sun dried tomato laden ciabatta and enjoy!

Serves 4


Wednesday, May 4, 2011

{tasty} Grilled Polenta w/Roasted Veggies

If I have zucchini and bell pepper on hand, chances are I am going to chop them up and roast them.

When I roast vegetables I will want to flavor them further with balsamic vinegar, because its just the right thing to do. 

And chances are if I have a lovely, delicious, bright, colorful vegetarian dish like this I will have to add Italian sausage, because I can't leave well enough alone. 


Ok Ok, Enough with the If You Give a Mouse a Cookie throwback...

There are a lot of steps to this recipe, but luckily they are all rather simple. I love the flavors of this dish, I may be a little obsessed with balsamic vinegar. Can you blame me?

Polenta:
  • ½ cup ground cornmeal
  • 1 cup vegetable broth
  • 1 cup milk
  • 1 bay leaf
  • ½ cup parmesan cheese
  • ½ tsp salt


Balsamic Veggies & Sausage
  • ½ pound Italian Sausage
  • 1 zucchini, coarsely chopped
  • 1 medium eggplant, peeled and  coarsely chopped
  • 1 red onion, coarsely chopped
  • 1 bell pepper, coarsely chopped
  • ½ can artichoke hearts
  • 2 cups grape tomatoes, quartered
  • 6 sun dried tomatoes, sliced
  • 1 tbsp olive oil, divided
  • 2 tsp balsamic vinegar
  • 2 cloves garlic
  • 2 tsp dried parsley
  • 2 tsp dried basil
  • 1 tsp salt, divided

You will want to make the Polenta ahead of time so it has time to firm up before slicing and grilling.

In a medium sauce pan bring broth, milk, and bay leaf to a low boil. Slowly add in cornmeal while whisking to avoid clumping. Turn heat to low and cook about 5-10 minutes, stirring frequently until smooth. Remove from heat and add salt and Parmesan cheese. Mix thoroughly. Allow to cool for about 15 minutes, then dallop it all down onto a large piece of plastic wrap and roll back and forth forming a log. If you want to simplify it a little more you could easily mold it into a lined loaf pan. Refrigerate for at least an hour.

Preheat oven to 450 degrees.
Combine zucchini, eggplant, onion and bell pepper on a lined baking sheet and toss with 2tsp olive oil, vinegar and ¾ tsp salt. Roast for about 15 minutes; toss and continue roasting until nicely browned, about 30 minutes more.

While the veggies are roasting, combine tomatoes, sun dried tomatoes, artichoke hearts, 1 tsp olive oil, garlic, remaining salt, parsley and basil in a bowl; toss to coat. Set aside and let all those wonderful flavors marry in to each other. 

Remove the Polenta from plastic wrap and slice into ½ inch slices. Cook on a greased grill pan on medium high heat for about 3-5 minutes per side.
While polenta is cooking brown the sausage in a large saute pan over medium high heat. Once browned add the roasted veggies and cook for about 2 minutes longer. Turn off heat and add the tomato mixture; toss well. Serve over polenta. 

Serves 4. *Adapted from Weight Watchers*

Thursday, April 28, 2011

{tasty} Today

Today, I slow cooked a brisket in nothing but this...


and I quite liked it. 

Tuesday, April 12, 2011

{tasty} Bacon Cheddar Beer Bread

Beer bread is something wonderful. Its fool proof, and sometimes thats exactly what I need. I have been trying my hand at home made bread lately and honestly haven't had that much luck. One thing I have most definitely learned is that you cannot go by a set amount of time when it comes to allowing the bread to rise. And yes, I learned that the hard way. It all comes down to temperature. For rising and baking. Slowly but surely I am working out all the kinks.

With beer bread, however, that is not an issue. And better yet, it is SO simple and super versatile.

Basic Beer Bread
  • 3 cups Flour
  • 1 tbsp sugar
  • 1 tbsp baking powder
  • 1 tsp salt
  • 1 12oz bottle of beer

See? Simple! You can even omit the baking powder by using self rising flour.

The great thing about this recipe is that you can season it however you want. Whatever flavor calls out to you, just go for it. Also try different beers, as that will change the flavor profile as well. The first time I played with it I came up with this bacon cheddar version and its so good I just don't want to try anything else. I have used the Guinness as I did here. An IPA, which truth be told was not my cup of tea but my husband loved it. And more often New Castle.

To the basic recipe above, add:

  • 1/2 lb bacon, cooked crisp and chopped
  • 1 cup sharp cheddar cheese, shredded
  • 2 tsp dried rosemary

Preheat oven to 375° and grease a loaf pan. Combine all ingredients, except beer, in a large bowl and mix together. Slowly pour in beer and mix until combined. Spread in to loaf pan and bake until golden and toothpick comes out clean, about 45 minutes. Bake for 20-25 minutes if doing muffins.


Cool on wire rack for 10 minute, remove from pan and cool 10 minutes more. Serve warm, or room temperature.

And let me tell you, this bread is so moist and tasty that you don't even need butter.

Saturday, April 9, 2011

{tasty} Slow Cooker Pulled Pork

I love my slow cooker. If I had the space it would probably have a permanent spot on my kitchen counter. My absolute favorite thing to make is pulled pork. It is easy. Nearly effortless. And downright delicious. Not to mention the leftovers. First things first, leftovers always start with pork & potato tacos. Always. Well, unless in this case where this delicious pork hurried out my door and off to my husbands work for a slow cooker cook off. 


This simple rub is wonderfully earthy and compliments pork nicely. 


Coffee Rub
  • 3 tbsp Chili Powder
  • 1 tbsp Cumin
  • 1/2 tbsp Garlic Powder
  • 1/2 tbsp Salt
  • 1/2 tbsp Pepper
  • 6 tbsp finely ground coffee


Trim large fat pads from a 3 pound pork shoulder and lightly rub with oil. Work the rub in over the whole roast. You want the sucker totally covered. When you think you have saturated it enough, add whatever rub you have left and saturate it more. Throw it in the crockpot and cook on low for 10-12 hours. Because of the fat content of the pork shoulder you do not have to add liquid. If you use tenderloin, add about 1/2 cup of stock or water. 


When the pork is done use two forks to shred it to pieces. 


Here is where it gets tricky. Its time to add some sauce. But please, do not douse this deliciously earthy pork in your traditional store bought tomato based BBQ sauce. Im begging you. It will be the worst mistake of your life.

It wasn't until recent years that I discovered that other parts of the country consider BBQ to be something totally different than what I grew up with. What I grew up with was nothing more than terrible in a bottle. It rivals Miracle Whip.

The first time I made a vinegar based sauce I fell in love. Its tangy, zippy, a little sweet and surprisingly enough really allows the flavor of the meat to come through. I don't believe I have ever made this sauce the same way twice, but the basics are always there. Apple Cider Vinegar, Mustard, and Brown Sugar. As far as I know this is a Carolina style BBQ sauce. Although it seems this varies a lot region to region.

I have made this pork twice, with 2 different sauces and loved both


Sauce #1
2 cups
 apple cider vinegar

1 cup mustard, just plain old yellow mustard
1 1/2 teaspoon black pepper, fine grind, or to taste
1 tablespoon Worcestershire sauce
1 cup dark brown sugar
1/2 teaspoon cayenne pepper
1/2 teaspoon salt
1 teaspoon your favorite hot sauce, or to taste

Combine in a saucepan and simmer for 30 minutes. Do not boil. Makes 4 cups. 


Sauce #2
1 cup apple cider vinegar
1 cup applesauce (could use apple juice as well)
1/2 cup mustard
1/2 cup ketchup
3 tbsp Worcestershire sauce
2 tbsp honey
hot sauce, to taste
garlic
black pepper

Combine all ingredients and mix well.
Sadly these are all approximations. I threw this sauce together quickly and didn't measure anything. This was actually my favorite sauce with this pork. I will definitely have to make it again and hopefully find that I got this right.

Add your sauce to the pork and cook on high for about 15 minutes. Serve up on buns with Pepperjack cheese. Yum!

Wednesday, March 2, 2011

{tasty} Bacon Biscone

Im just going to put it out there.

We are a family that loves bacon.

Its true. Even my son will jump for joy and shout "bacon!" when he finds out I'm making some.

As much as we love bacon, we do try to limit our intake of pure bacon goodness to about once a month or so. And when we do have it, I love to bake with it. Sweet or savory, bacon makes everything better.

My husband requested I make scones with bacon, cream cheese and green onion. It was totally his idea, but heck I did all the work! I made 3 dozen of these biscuits? scones? I suppose its a biscone. I enjoyed a couple and sent the rest off with my husband to work. Im pretty sure they were gone within a day and a half.

First things first, you have to cook the bacon. I usually bake mine on cookie sheets. Its pretty effortless and they cook up great! Take cream cheese and butter out to soften slightly while bacon is cooking

Allow the bacon to cool, and roughly chop. Heat oven to 375 degrees.


Cube butter and coarsely chop the cream cheese. My idea behind freezing the cream cheese is similar to why you use frozen butter. I wanted pockets of cheese and not so much melted throughout.

Add all the dry ingredients into a large bowl. Cube frozen butter and cut into dry ingredients with a fork or pastry blender until the butter is the size of peas and some larger pieces. Gradually add in the cold buttermilk until it is just combined. Coarsely chop the cream cheese and 4 green onions, fold in to the biscone mixture, along with the chopped bacon. 
Using an ice cream scooper, arrange scoops of the biscone mixture onto a lined or greased baking sheet. Bake, until the tops are starting to brown, about 20 minutes. 
While these are baking, melt about 2 tablespoons of butter and combine with 1 clove minced garlic and 1 green onion, finely chopped. 
When biscones are slightly browned brush or spoon butter over each one and bake until golden brown, about 5-8 minutes more. 


Bacon Biscones: makes 12

  • 3 cups all-purpose flour
  • 3 tablespoons granulated sugar
  • 2 tablespoons baking powder
  • 3/4 teaspoon salt
  • 1 teaspoon coarsely ground black pepper
  • 1/2 cup cold/frozen butter, cut in cubes
  • 2 tablespoons butter, melted
  • 1 1/4 cups cold buttermilk
  • 4oz cream cheese, frozen
  • 8oz bacon, cooked crisp
  • 5 green onions, divided
  • 1 garlic clove, minced

Wednesday, February 16, 2011

{tasty} 2 things I never thought I'd say

I love canned chicken.
I love Brussels sprouts.


Oh yes, I sure do. And they often come together for a deliciously satisfying lunch, and I mean often.

The idea of eating canned chicken had never even crossed my mind before. Why? Im not sure. Its not like eating canned tuna is foreign to me. It just wasn't even on my radar apparently. While visiting with a friend one day she made us chicken salad sandwiches for lunch and I have been hooked ever since. She told me she keeps canned chicken in her pantry at all times not only for chicken salad but for quick dinners, like chicken enchiladas. The following Monday on grocery shopping day I had to buy a can. And the next time I went to Costco I had to buy a pallet full. Ok, really it was a 6-pack, but it is Costco after all. A pallet is totally believable. It is low in calories and fat and nicely but subtly flavored. What's not to love?

I don't recall ever trying Brussels sprouts as a kid. It was just one of those things I assumed I didn't like because I had never heard good things about them. I was continuously seeing them in the grocery store and finally decided I should give them a try. I hopped on Tastykitchen.com and found this recipe. Oh, it was heaven! I could have eaten the entire pan of them. I have tried a few different ways to cook them, and so far I love them all.  They are as good simply roasted with olive oil, salt & pepper as they are sauteed with dried cranberries and walnuts. With or without carrots. But almost always with a little butter.


A chicken salad sandwich and Brussels sprouts has become my go-to lunch. I cant stop making it. Since I get 3 servings out of my chicken salad, which I love with dried cranberries, walnuts, and green onions, I often have this 3 times a week. I have yet to grow tired of it; its just that good. I suppose it doesn't hurt that I do try to switch it up every now and then. Sometimes I swap out the bread with lettuce, or crackers. Thats variety enough for me.

Friday, January 28, 2011

{tasty} A lesson in baking

It feels like winter is quickly passing us by, but I'm not quite ready to let go just yet. I am still holding out hope that we will get some snow. And by snow, I mean snow that actually accumulates and sticks around for more than an hour. It doesn't take much to make this native Californian happy. Cold weather? Gloom? Ice!? I'M IN! I just want some snow too! Is that too much to ask? I don't think so.

One thing I love about winter is the food that comes with it. The comforting soups, hot tea, squash. All the yummy goodness that warms your heart. For me, while it may not be completely synonymous with winter, clove, is another one of those comforts. The smell is intoxicating and the flavor is unmistakable. I had the idea to make a chocolate chip cookie, but not just any chocolate chip cookie. An orange-clove chocolate chip cookie. Oh yeah, thats right. 

Given, I really don't know all that much about baking other than I follow a recipe, bake a bunch, eat a bit, and send the rest off with my husband when he goes to work. I figured it couldn't be too hard. I took the standard tollhouse recipe and thought I had a brilliant idea, simple syrup! I made a simple syrup of sugar, orange juice, and ground cloves. The smell was amazing and ultimately the syrup was exactly what I was looking for. A punch in the face of flavor! Exactly my intention. I used this in place of sugar in the recipe. Not my intention, however, was the complete muddlement of flavor when I added flour to the mix. I ended up having to add brown sugar, and tweak a bit to pull the flavor back in. In the end I quite liked my cookie, but it wasn't exactly what I was going for. Lesson being, keep trying! Hey, I never said it was a profound lesson...

Thus came round two! I decided to give it another shot on Tuesday and kept things a little simpler; which resulted in quite a tasty cookie!


I may or may not have had 5 for lunch that day. 


In my defense, that was all I ate for lunch that day. 


That makes it better, right?


So, lets get to it.
Pre-heat oven to 325 degrees. Adjust oven racks to upper- and lower- middle positions. 

Start by mixing flour, salt, baking soda and cloves together in medium bowl; set aside. 

Melt and cool butter

Either by hand or with electric mixer, add sugars until thoroughly blended. Mix in egg, yolk, orange juice and extracts. 

Add dry ingredients; mix until just combined. Do you see all those gorgeous specks of clove?

add in the chocolate chips


Drop dough by rounded tablespoon full onto ungreased or parchment lined cookie sheet

Bake until cookies are set around outer edges start to harden yet centers are still soft and puffy, 12-15 minutes.  Cool cookies on cookie sheets. 

ENJOY!

Now, I must admit, something possessed me to add a little extra orange juice to my dough so my consistency is a little thinner than what you would get based off my recipe. It made for an interesting texture, but of course, the flavor is what really matters. 


Orange-Clove Chocolate Chip Cookies
1/2 cup butter (1 stick), melted
1/3 cup orange juice
2 1/4 cups flour
1/2 tsp baking soda
1/2 tsp salt
2 tsp ground cloves
1 egg + 1 egg yolk
1 cup brown sugar
1/2 cup granulated sugar
1 tsp vanilla extract
1 tsp orange extract
1 1/2 cups chocolate chips

Pre-heat oven to 325 degrees. Adjust oven racks to upper- and lower- middle positions. 

Start by mixing flour, salt, baking soda and cloves together in medium bowl; set aside. 

Melt and cool butter. Either by hand or with electric mixer, add sugars until thoroughly blended. Mix in egg, yolk, orange juice and extracts. Add dry ingredients; mix until just combined. Add in chocolate chips. Drop dough by rounded tablespoon full onto ungreased or parchment lined cookie sheet. Bake until cookies are set around outer edges start to harden yet centers are still soft and puffy, 12-15 minutes.  Cool cookies on cookie sheets. 

Monday, January 24, 2011

{tasty} so NOT a food blogger

It is a good thing food blogging isn't my sole purpose here. It wouldn't survive me. My camera is currently sitting within arms reach of my kitchen and has been there for the last several days. Did it even occur to me to pick it up a snap some pictures while cooking dinner tonight? Of course not!

Even though I plan my meals out every week, so I know what I will be making, I still find myself rushing to get dinner done every night. Tonight was not so much that I was rushing, but that I was literally doing 5 things at once. Balsamic vinegar reducing on one burner. Kale sauteeing on another. Water boiling for gnocchi on a third burner. A grill pan heating up on the last, waiting for some ultra thin round steaks. And cubed butternut squash roasting in the oven. 

I did however snap a photo with my phone. Its possible I rely on it a little too much. 

It was at this point that all the seperate components were coming together to look ever so lovely and delicious. 

And it didnt end here. I tossed in about a cup of Classico Sun-Dried Tomato pasta sauce, best canned sauce ever! And served with a little balsamic reduction and Parmesan cheese on top, and my super thin steaks on the side. The steak was not the star. It wasn't even necessary. But hey, what can I say? We like meat.