
This week Glitz Design is focusing on the current feather trend. Wild & Free and Finnley both have an assortment of fun feathers to choose from so I knew I wanted to pull elements from both of those kits. The woodgrain patterns from Dapper Dan were perfect to balance out the vibrant color from the other collections.

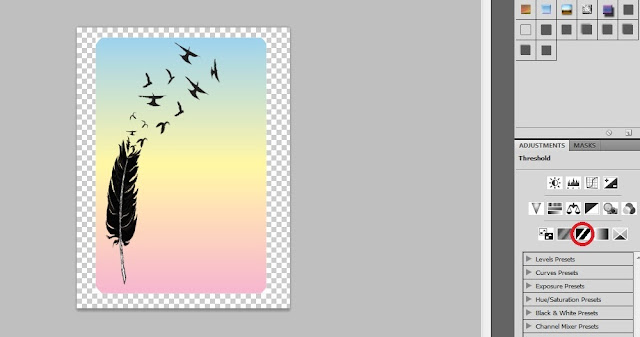
I knew I wanted to take this feather/bird image from Wild & Free and create a large cut out in my background. To do this in PS I opened the image and clicked on "Threshold" to turn the image to strictly black and white.
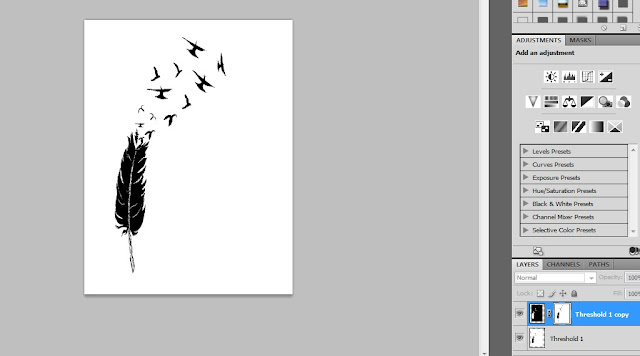
Next you can delete your original layer, the one without the mask, and you will be left with a black and transparent image that you can now use as a clipping mask.

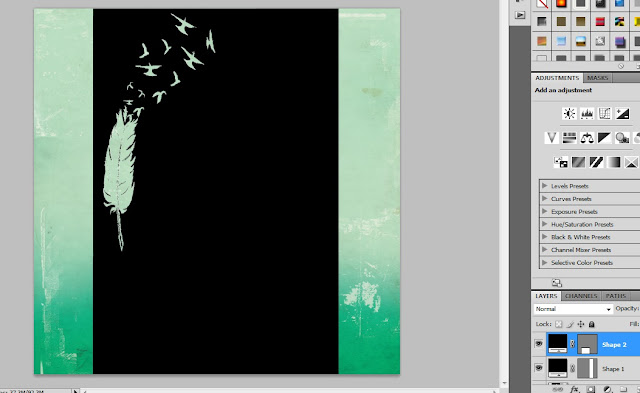
I open up my paper in a new window and paste my clipping mask over the top to decide on placement. The black area of my clipping mask is where my background paper will be so what I have done here is add black rectangles to fill in the area.
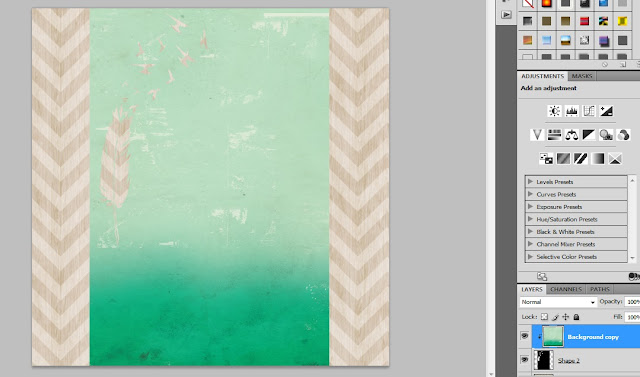
Next, select the shape layers and the feather layer and merge them together. Move the background paper above this layer and with it selected click ctrl + alt + g to clip your paper to the mask. Add your other paper behind it, and that's it! All that is left is to add a drop shadow to create depth.
I hope that made some sense! I know there were more steps than photos but I tried not to make this too picture heavy. It does seem like a long process but once you do it once or twice it is quite fast. I'd love to hear if anyone has a different method of doing this!
Supply List:
Glitz Design “Finnley” Full Digital Kit
Glitz Design “Wild & Free” Elements 2
Glitz Design “Dapper Dan” Paper Pack
Other: Valorie Wibbens Sprinkles V14 and By the Thread
Glitz Design “Finnley” Full Digital Kit
Glitz Design “Wild & Free” Elements 2
Glitz Design “Dapper Dan” Paper Pack
Other: Valorie Wibbens Sprinkles V14 and By the Thread
Thank you for looking!

Great tutorial. Thanks for sharing.
ReplyDeleteVery easy to follow tutorial. Thank you!
ReplyDelete