It has been quite a while since I have participated in Fix-It Friday over in the I Heart Faces community. When I saw the image up for editing today I knew I wanted to play! Editing my own photos, I often stick to basic clean edits but sometimes it is a nice break to have a little fun with it. I knew looking at this picture, by Angie Arthur Photography, that I wanted to give it a saturated urban feel.
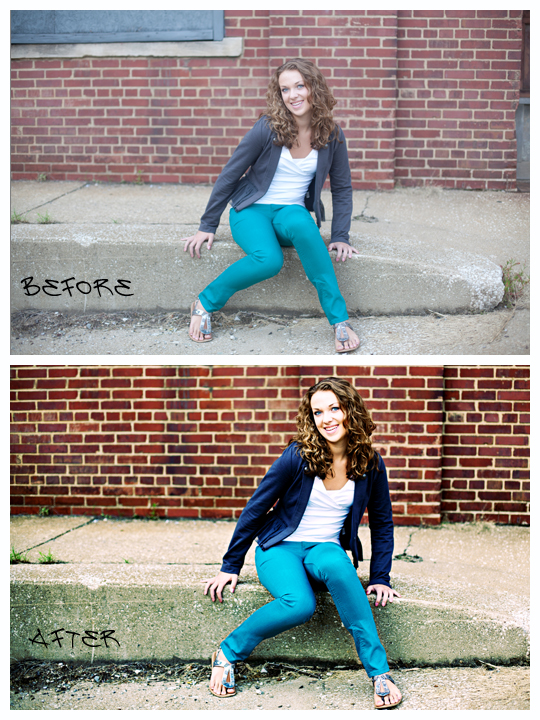
Here is what I did for my final image, it may look like a long list but each step is fairly basic
Edited in Photoshop CS4
- Cropped
- Selected a portion of the brick wall, feathered to 20px and copied to a new layer to get rid of the small amount of window that was left after cropping.
- Levels adjustment layer on each channel (you can see my tutorial on this here)
- Duplicated the background image and set to Overlay blend mode, reduced to 80% opacity and masked back her shirt to bring back some detail
- Duplicated the background image and set to Multiply blend mode, reduced to 40% and masked back the girl.
- Duplicated the background image and ran a High Pass Sharpen with a radius of 20px and set to vivid light blend mode, reduced opacity to 35%
- Duplicated the background image and set to Linear Light blend mode, reduced to 10%
- Selective Color adjustment layer, selected Reds and reduced magenta to -50 and upped yellow to +5
- Gradient adjustment layer with a violet/green/orange gradient, reduced opacity to 30% and masked back the girl at 50% opacity to reduce discoloration in her skin.
- Flatten layers and save.

So cool!!!
ReplyDelete